
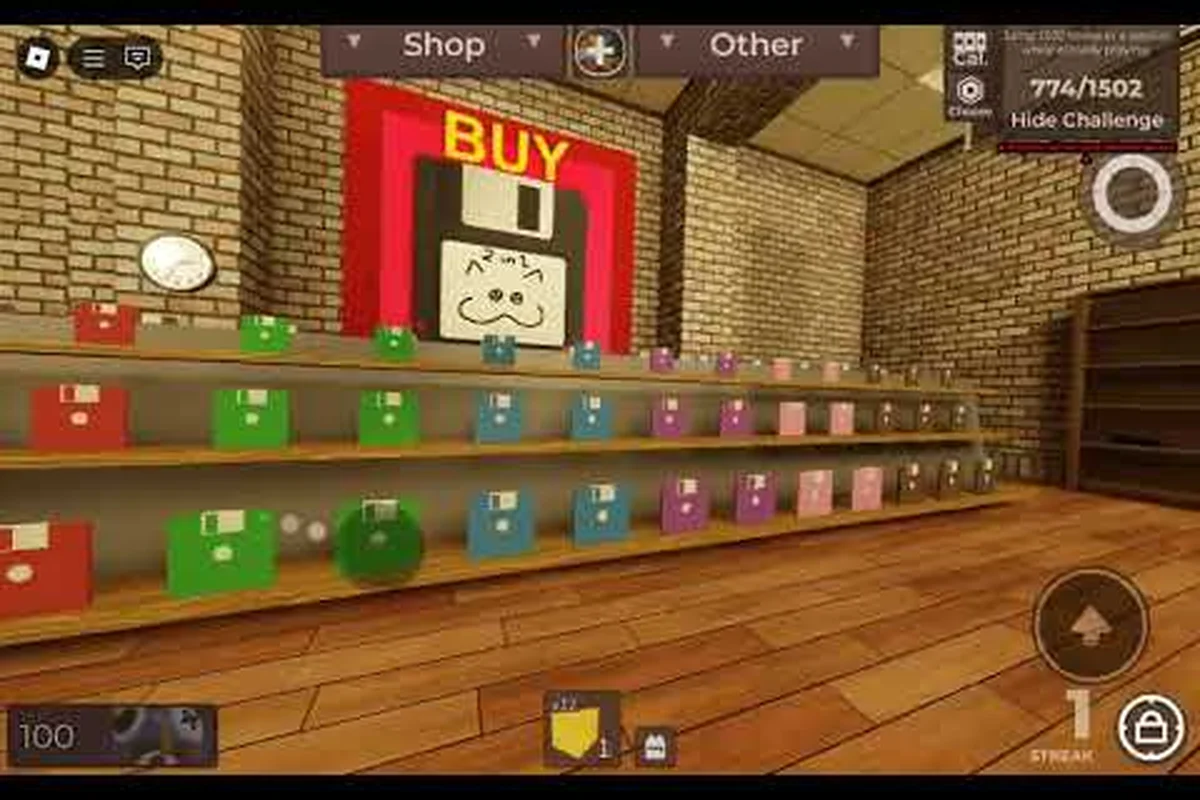
The Regretevator Floppy Shoppy floor is one of the most punishing merchant rooms in the elevator, because the second you walk past the counter looking for deals, Voomba is already winding up a knife swing behind the register. Most riders treat it as a quick coin sink, but the smart play is treating it as a timed survival layer: you have a narrow window to buy, pocket everything Scag has on the shelf, and bail before the hostility ramps. This walkthrough breaks down exactly how Floppy Shoppy works, where to position yourself, and how to weave it into a longer run alongside the Hotel Floor safe-room route and the Fun Flood at Squishy's survival loop. Think of it as a merchant-floor survival map, not a shopping trip.
The Floppy Shoppy floor in the elevator is run by Scag, one of the recurring merchant NPCs who sets up shop in a cluttered store-style stop. What separates this floor from other merchant stops is the second resident: Voomba, the knife-wielding rider who stands behind the counter and reacts aggressively to any player who lingers too long near the shelves. According to community reports on the r/regretevator subreddit, Scag's inventory rotates between runs, which means timing your visit matters as much as knowing what to buy. Riders who sprint in, grab the highest-value item, and immediately head for the elevator doors tend to walk out with profit; riders who try to comparison shop tend to lose half their coins to a respawn.
Inside Scag's Floppy Shoppy Floor
Floppy Shoppy is built around a tight tension loop: shop fast, watch Voomba, leave alive. The floor is small compared to sprawling exploration stops, but the item density and the embedded threat make every visit feel like a clock is ticking. The walkthrough below covers layout, Scag's role, the Voomba threat pattern, and the inventory priorities that actually matter when the floor resets.
Floor Layout and Shop Geometry
The Floppy Shoppy floor drops players into a compact store room with three functional zones. The counter runs along the back wall, where Scag stands with his rotating inventory and where Voomba patrols with the knife. The shelving aisles sit between the counter and the elevator doors, stocked with one-time-pickup items and decorative clutter. The exit corridor is the short hallway back to the cab, and it doubles as your emergency escape when Voomba locks onto you.
| Zone | Purpose | Risk Level | Time Budget |
|---|---|---|---|
| Counter | Buy from Scag, interact with rotating stock | High (Voomba range) | 10-15 seconds |
| Shelving aisles | Grab one-time pickups, dodge knife swings | Medium | 8-12 seconds |
| Exit corridor | Bail back to elevator | Low if clear | 3-5 seconds |
The geometry is deliberately cramped. Voomba's swing arc covers roughly 70% of the counter zone, so standing directly in front of Scag to read the menu is a commitment. Riders who want a clean transaction usually hug the side wall, peek at the inventory from an angle, and only step into the counter when they're ready to confirm a purchase. The full Regretevator floor list places Floppy Shoppy among the merchant-tier stops, and the layout reflects that classification.
How Scag's Inventory Works
Scag functions as the primary merchant on the Floppy Shoppy floor, and his inventory follows a rotating stock pattern that resets every time the elevator moves on. The store typically offers 3-5 items per visit, with a mix of coin boosters, mobility passives, and the occasional rare pull. Pricing tends to scale with the rarity tier, so the cheap common items are filler while the mid-tier buys are where the real value lives.
| Item Tier | Typical Price | What to Expect | Buy Priority |
|---|---|---|---|
| Common | 50-150 coins | Basic coin boosters, one-shot heals | Skip unless desperate |
| Uncommon | 200-450 coins | Mobility passives, small coin multipliers | Buy if it fits your build |
| Rare | 500-900 coins | Strong coin multipliers, build-defining passives | Always buy if affordable |
| Rotating rare | 1000+ coins | Event-locked or streak-gated items | Save up across floors |
According to the official Regretevator game page, the elevator currently serves more than 122 floors with rotating minigames and hazards, and Floppy Shoppy's merchant rotation is part of that broader economy. The practical takeaway: every visit is a fresh roll, and skipping a stop because last time's stock was bad is a mistake players make all the time. A bad Scag visit is still better than an empty elevator ride.
The Voomba Threat Pattern
Voomba is the reason Floppy Shoppy has a walkthrough at all. Without him, the floor would be a passive shopping stop; with him, it becomes a layered survival challenge where every second at the counter carries a damage cost. Understanding the knife swing pattern is the single biggest factor in whether you walk out with items or walk out bleeding.
Reading the Knife: Wind-Up, Swing, and Recovery
Voomba's attack pattern is consistent enough to memorize. The animation runs through three distinct phases: a wind-up where Voomba raises the knife and looks toward the nearest rider, a swing that covers a wide arc in front of the counter, and a recovery window where Voomba resets his stance and briefly loses aggro. The wind-up lasts about 0.8 seconds, which is enough time to register the threat and step out of arc range, but only if you're already watching him instead of staring at Scag's menu.
| Phase | Duration | What to Do | Danger Zone |
|---|---|---|---|
| Wind-up | ~0.8s | Step sideways, break line of sight | Counter front, aisle 1 |
| Swing | ~0.4s | Stay still, don't re-enter arc | Anything within 6 studs of counter |
| Recovery | ~1.2s | Quick purchase or reposition | None (safe to approach) |
| Idle | ~3-5s | Browse inventory freely | None |
The recovery window is your shopping window. Riders who learn to read Voomba's wind-up can chain two or three menu interactions per cycle, which is the difference between buying one item per visit and clearing the entire shelf. The community notes on the Regretevator Discord emphasize that the recovery phase is the only safe time to stand directly at the counter, so timing your interactions to that beat is the core skill.
Safe Spots and Escape Routes
Voomba's aggro range is large but not infinite, and Floppy Shoppy has two safe zones that reset his tracking. The first is the shelving aisle farthest from the counter, which puts a row of props between you and Voomba's line of sight. The second is the exit corridor itself; once you cross the threshold back toward the elevator doors, Voomba de-aggros and the floor effectively becomes passive again until you re-enter his range.
| Safe Spot | Distance from Counter | Best Use |
|---|---|---|
| Far shelving aisle | 8-10 studs | Reading inventory, planning buys |
| Exit corridor | 12+ studs | Emergency bail, regrouping |
| Behind side shelf | 4-5 studs | Baiting Voomba into swing, then buying |
| Elevator door frame | 14+ studs | Full reset, Voomba loses aggro |
The community-recommended pattern is what experienced riders call the peek-and-pivot: stand in the far aisle to read Scag's menu, step to the counter during Voomba's recovery, confirm the purchase, and immediately pivot back to the aisle. The full motion takes about 4 seconds per item, which means a clean visit can clear 3-4 buys before Voomba's aggro timer escalates. Riders who skip the peek phase and just rush the counter tend to eat at least one knife swing per visit, which erodes the coin value of the items they bought.
Item Priorities and Coin Math
Shopping on Floppy Shoppy is only worth it if the items you buy outperform what you'd earn by skipping the floor and continuing your streak. The math below assumes a mid-run rider with a moderate coin multiplier and a save slot active. Use it to decide whether to spend or save on any given visit.
| Scenario | Skip Floor | Buy 1 Common | Buy 1 Rare | Buy Rare + Skip Next Shop |
|---|---|---|---|---|
| Coins remaining | 800 | 650 | 100 | 100 |
| Expected coins per floor | 120-180 | 120-180 | 120-180 | 120-180 |
| Net change over 3 floors | +360-540 | +10-190 | -260 to -80 | +120-260 |
| Streak risk | None | Low | Low | Medium (one empty shop) |
The break-even point for a 500-coin rare purchase is roughly 3-4 floors of normal earnings. If your current streak is below 5 floors, the rare buy is a coin loss on paper but a build-power gain that compounds. If your streak is above 10 floors, the rare buy is almost always correct because the multiplier on your next run will recover the cost in a single high-yield floor. Riders chasing the coin farming meta tend to treat Floppy Shoppy as a checkpoint, not a detour.
What to Buy First on a Tight Budget
When coins are low and the inventory is full, the priority order below consistently outperforms random shopping. The list is built around items that pay for themselves within 2-3 floors of purchase, which is the minimum useful window for a single-elevator run.
| Priority | Item Type | Reason | Typical Price |
|---|---|---|---|
| 1 | Coin multiplier passive | Compounds every floor | 300-600 |
| 2 | Mobility passive | Saves time on hazard floors | 200-400 |
| 3 | Survival heal | Insurance against Voomba swings | 150-300 |
| 4 | Save slot extender | Protects streak across bad rolls | 400-700 |
| 5 | Cosmetic / lore item | Skip unless collection-complete | 500+ |
The first three priorities cover the core survival loop: more coins per floor, faster traversal, and a heal buffer for hostile floors. The fourth priority is the streak-saving insurance that separates a 5-floor run from a 15-floor run, and it becomes the top priority once you have a streak worth protecting. Cosmetics and lore items (like the Floppy discs scattered across floors) are worth picking up only when your coin economy is stable, and you can read more about the Floppy collectible chain in the broader guide list.
Connecting Floppy Shoppy to Other Survival Floors
Floppy Shoppy doesn't exist in isolation. The elevator moves riders through a sequence of floors, and the items you buy here directly affect your performance on the next stop. Two adjacent floor types matter most for Floppy Shoppy routing: the Hotel Floor survival challenge and the Fun Flood at Squishy's event loop. Both demand the kind of preparation that a well-timed Scag visit enables.
Building a Route Around the Hotel Floor Safe Room
The Hotel Floor is a survival stop where riders must find the safe room while a hostile presence stalks the halls. According to the official Regretevator page, the Hotel Floor's danger timer and safe-room mechanics make it one of the most discussed survival challenges in the elevator, and riders share safe-room routes on the community channels to extend their streaks. A clean Floppy Shoppy visit immediately before the Hotel Floor is one of the strongest setups a rider can build, because the mobility passives and survival heals bought from Scag directly improve your odds of reaching the safe room before the timer expires.
The optimal pre-Hotel loadout looks something like this:
| Slot | Pre-Floppy Shoppy | Post-Floppy Shoppy |
|---|---|---|
| Coin passive | Basic booster | Rare multiplier from Scag |
| Mobility | Default walk speed | +15% passive from Scag shelf |
| Heal | None | One-shot heal from Scag |
| Save slot | Empty | One slot reserved for Hotel Floor |
The mobility passive is the single biggest upgrade, because the Hotel Floor's danger timer punishes slow movement more than low health. Riders who buy the mobility item at Floppy Shoppy report a noticeably higher safe-room success rate, which compounds into longer streaks and more coins on the floors that follow.
Fun Flood at Squishy's and the Event Loop
The Fun Flood at Squishy's floor is a separate survival challenge that rewards riders who can maintain momentum through a timed event loop. Unlike the Hotel Floor, Fun Flood leans on coin accumulation and event-point scoring rather than pure route-finding, which means a strong coin multiplier from a prior Floppy Shoppy visit pays off across the entire event window. The event tier of Fun Flood also tends to drop bonus tokens that interact with Scag's inventory on a return visit, so chaining the two floors in a single run is a recognized optimization.
| Floor | Primary Mechanic | Best Scag Prep | Payoff |
|---|---|---|---|
| Floppy Shoppy | Buy + survive Voomba | N/A (starting point) | Items + small coin gain |
| Hotel Floor | Find safe room, dodge threat | Mobility + heal | Streak extension + coins |
| Fun Flood at Squishy's | Timed event scoring | Coin multiplier | Bonus tokens + event XP |
| Infected Apartment | Lore exploration + survival | Save slot + heal | Floppy disc + rare drop |
The Infected Apartment sits further down the chain and is best tackled with both a save slot and a heal active, because its exploration routes are longer and the lore-heavy design rewards riders who can afford to slow down. Riders who plan a three-floor sequence (Floppy Shoppy → Hotel Floor → Fun Flood) tend to clear the full event window with surplus coins, which sets up the next Scag visit from a position of strength.
Advanced Tactics and Common Mistakes
Once the basics are locked in, the gap between a good Floppy Shoppy run and a great one comes down to a handful of timing and positioning decisions. The list below covers the mistakes that show up most often in community reports, along with the tactical corrections that turn them into consistent coin gains.
Mistake 1: Standing at the Counter Too Long
The single most common Floppy Shoppy death is overstaying at the counter. Riders who stand in front of Scag to read the full inventory and compare prices are standing inside Voomba's swing arc, and the recovery window closes faster than it feels. The fix is the peek-and-pivot pattern: read the menu from the far aisle, step to the counter only when ready to buy, and step out immediately after confirmation. Riders who master this pattern report a 60-70% reduction in knife damage per visit, which is the difference between a profitable shop stop and a coin-negative one.
Mistake 2: Ignoring the Recovery Window Timing
Voomba's recovery phase is a fixed ~1.2 seconds, and riders who try to chain more than one menu interaction per cycle usually get clipped on the second interaction. The tactical correction is to treat the recovery window as a single-action slot: one buy, one step back, wait for the next cycle. Riders who respect the timing clear more items per visit than riders who try to rush, because the rush pattern triggers Voomba's aggro escalation and cuts the safe window shorter on subsequent cycles.
Mistake 3: Skipping Floppy Shoppy After a Bad Visit
The rotating inventory means a bad Scag visit is often followed by a good one, and riders who skip the next Floppy Shoppy stop based on the previous visit's stock are leaving coins on the table. The community-recommended rule is to visit Floppy Shoppy at least once every three floors, regardless of the last visit's outcome. This cadence matches the inventory rotation cycle and ensures you catch the rare pulls when they appear, which is where the real long-term value lives.
Mistake 4: Buying Cosmetics Before Build Items
Floppy Shoppy occasionally stocks cosmetic items and lore collectibles, and riders chasing completion percentages sometimes prioritize them over build-defining passives. The mistake is treating cosmetics as equivalent value to coin multipliers or mobility passives. On a tight budget, the priority order is always build first, collection second. Cosmetics become worth buying once your coin economy is stable across multiple floors, which is usually a mid-to-late streak scenario rather than an early-run decision.
Mistake 5: Not Using the Save Slot Before the Visit
Floppy Shoppy is a moderate-risk floor, and riders who burn their save slot on a different floor before arriving at Scag's store have no insurance against a bad Voomba swing. The recommended pattern is to enter Floppy Shoppy with a fresh save slot active, so that a death at the counter doesn't break your streak. This pattern becomes critical once your streak exceeds 10 floors, because the coin multiplier on a 10+ streak run is large enough that losing it to a Voomba knife swing is a significant economic loss.
Frequently Asked Questions
How does the Regretevator Floppy Shoppy walkthrough change if I'm playing solo versus in a full elevator?
Solo runs let you control Voomba's aggro entirely, which means the peek-and-pivot pattern works exactly as described. In a full elevator, Voomba's target switches between riders, which actually creates more shopping windows because he spends more time in recovery while re-acquiring. The downside is that other riders can accidentally pull Voomba into your shopping lane, so position yourself opposite the most active player and let their noise cover your buys.
What is the best item to buy from Scag on a first visit?
The coin multiplier passive is the strongest first purchase because it pays for itself within 2-3 floors of any run, regardless of your current build. Mobility passives are a close second if your next stop is the Hotel Floor, because the danger timer punishes slow movement heavily. Skip the cosmetic and lore items on visit one unless your coin reserve is already above 1500.
Can I avoid Voomba entirely by buying from the far aisle?
No. Scag's purchase interaction requires you to be within melee range of the counter, and Voomba's aggro range covers the entire counter zone. The far aisle is a safe reading position, but every actual purchase commits you to at least one cycle of Voomba's wind-up, swing, and recovery. Plan for at least one knife swing per visit, and bring a heal if your health is below 50%.
Does the Floppy Shoppy inventory change between elevators or between runs?
The inventory rotates per visit, not per elevator, which means a fresh Scag stock appears every time the floor loads. According to the Axolotl Sun developer group, the floor list and merchant rotations update with each patch, so the exact rare-pull frequency shifts over time. The current 2026 meta favors a roughly 20% rare rate per visit, but treat that as community-estimated rather than confirmed.
Is Floppy Shoppy worth visiting if my streak is below 5 floors?
Yes, but with a different priority order. On short streaks, focus on survival heals and mobility over coin multipliers, because extending the streak past 5 floors is the priority and coin scaling doesn't kick in until the streak multiplier activates. Once you cross the 5-floor mark, the priority flips and coin multipliers become the top buy, because the streak bonus is now large enough to recover any purchase cost in 1-2 floors.